Transcribing label data for specimens imaged
1. When editing Bryophytes (Mosses) and Hepatics (Liverworts), go to http://bryophyteportal.org/portal/. When editing Lichens, go to http://lichenportal.org/portal/. A login is needed and permissions for editing the FLAS specimens are needed. Once that is done, one can proceed.
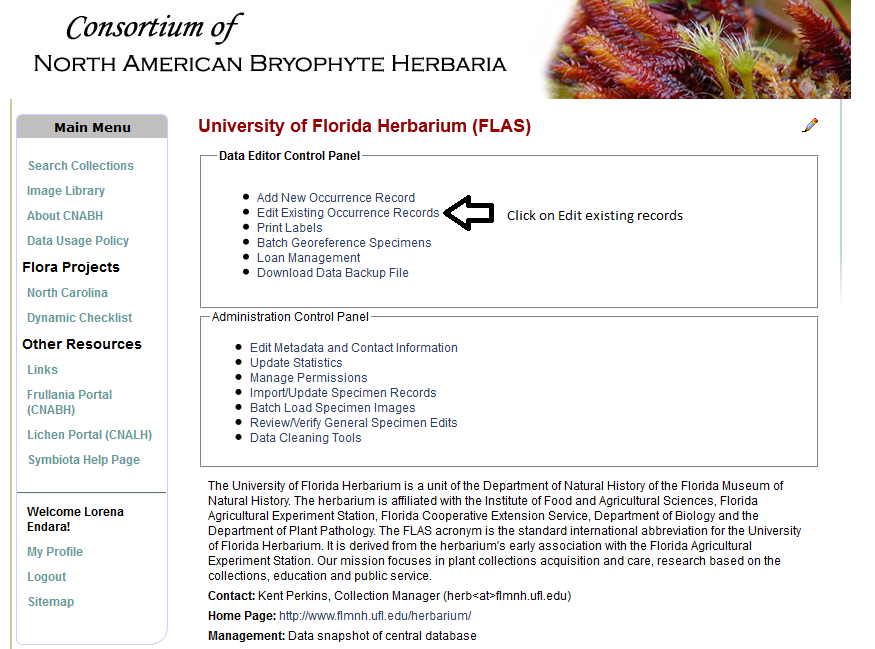
2. Go to the site, login, go to ‘my profile’, ‘occurrence management’, ‘collection management’, click FLAS herbarium. Under Data Editor Control Panel, click ‘edit existing occurrence records’.
3. Find “Custom Field 1” and select “Collector/Observer” in the drop down and “Is Null”. Click the “+” icon at the end of Custom Field 1, to add Custom Field 2, and select “Scientific Name” and “Is Null”.
4. Click “Display Table”. All the records displayed should be ones needing data transcribed from the label.
5. In the results table, find the blue arrow next to the Symbiota ID number – this will open the editor in a new tab. Fill in all data as below (Data Fields). To zoom on the image, hold-click and hold-shift and move the mouse on the image. To see an example, go to this specimen. Many fields search other records and provide suggestions; to choose a suggestion press the ‘down arrow’ and highlight the correct field (if applicable) and press ‘Tab’ to go to the next field.
6. Click “Save Edits” at the bottom of the screen to save all your data.
DATA FIELDS –
COLLECTOR: First Middle-Initial Surname (e.g. Henry L. Smith)
NUMBER: Collector number or “s.n.” if blank
DATE: YYYY-MM-DD (e.g. 2023-12-31)
SCIENTIFIC NAME: Genus species
IDENTIFIED BY & DATE IDENTIFIED (if given):
COUNTRY:
STATE/PROVINCE:
COUNTY (if applicable):
LOCALITY: Location data refer to all other named location details not given above (e.g. directions to a place). Type as a sentence, first letter capitalized, end with a period.
LATITUDE & LONGITUDE (if given): click the “F” button to convert from degrees/minutes/seconds to decimal degrees
ELEVATION (if given):
HABITAT: Describes where plant grew (forest, stream, etc.). Type as a sentence, first letter capitalized, end with a period.
DESCRIPTION: Describes the actual organism collected (its color, shape, height, texture, etc.). Type as a sentence, first letter capitalized, end with a period.
Transcribing label data of a specific specimen
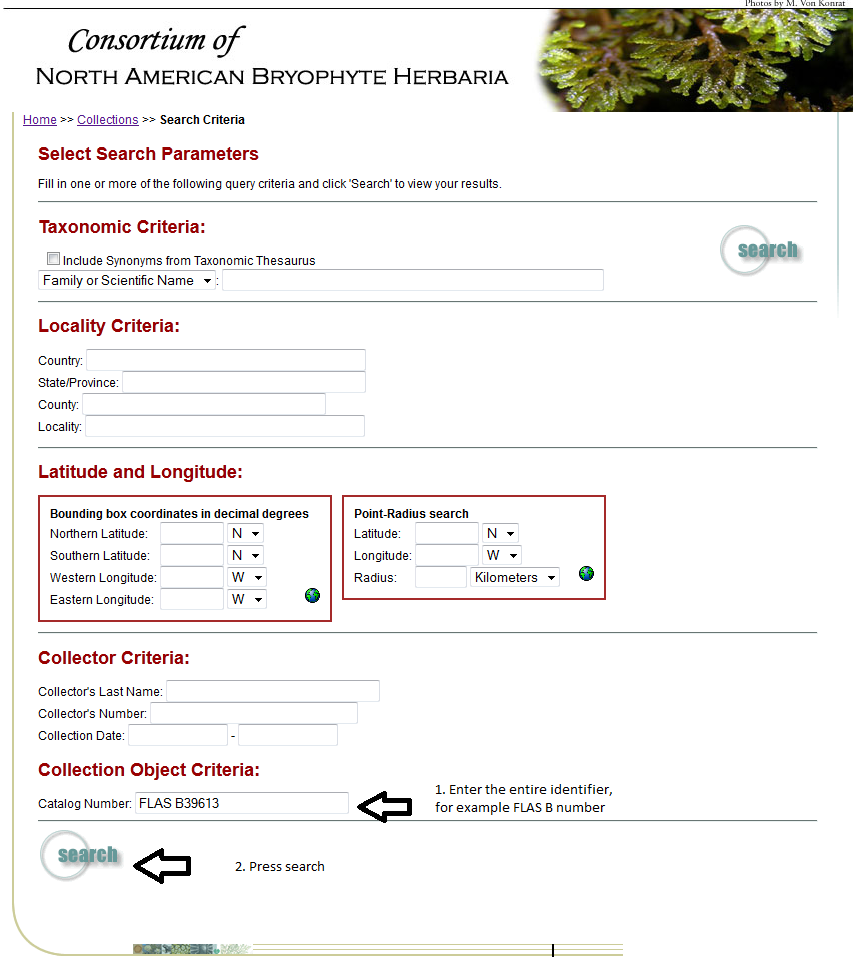
1. After logging in, go to the search tab and click “Search Collections”. Enter barcode number under “Catalog Number:”
2. In the results, click on “full record details” then at the bottom of the new window click “Occurrence Editor“.