1. Find the turtle skull
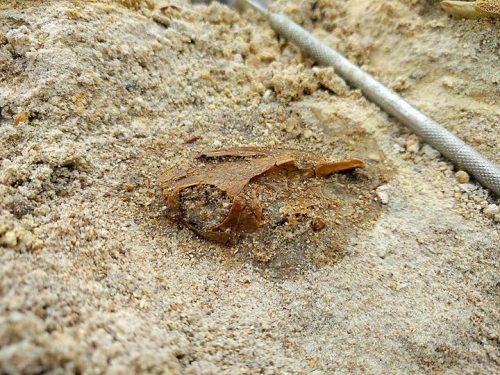
This is the left side of the pond slider turtle’s skull that we find at Montbrook, called Trachemys sp. The nose is pointing towards the left, the eye is quite visible, and the back of the skull is to the right. Turtle skulls are typically difficult to find in the fossil record because the pieces of the skull break up and float away or get carried away by predators, prior to burial. This nearly complete skull indicates that the turtle was buried rather quickly.
The above image shows the turtle skull after glue was applied. The glue is called paraloid B-72. It is a plastic based glue, that starts off as little plastic beads and is mixed with either acetone or alcohol. We use alcohol at Montbrook. You drench the specimen and even the dirt surrounding it, before creating a plaster jacket and attempting to remove it.
2. Pedestal the specimen
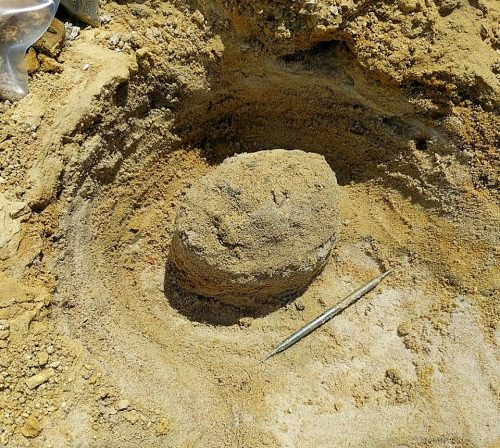
In order to remove such a fragile specimen, we must create a sturdy plaster bandage jacket around it. This is done by pedestaling the specimen.
What does that mean?
The ground around the specimen needs to be lower than the ground containing the specimen. In this case, we dug down, lowering the ground around the specimen so that it is about 3 inches higher than the surrounding area. (Please see the picture below for an example). We also re-cover the turtle skull with dirt, so that the plaster bandages do not stick to it.
3. Create the plaster jacket
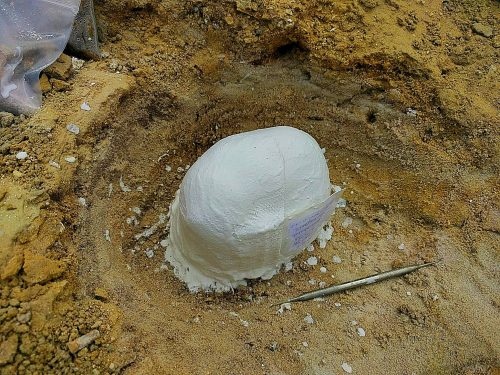
For such a small specimen, we use plaster bandages dipped in water to create the jacket. These plaster bandages are used to create a cast when you break a bone. For very large specimens we use Plaster of Paris mixed with water and strips of burlap.
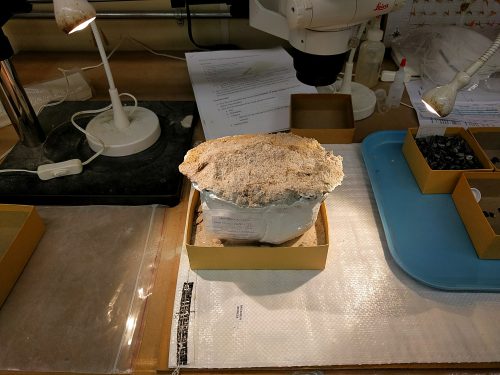
The bandages are crisscrossed over the pedestal and allowed to harden. Then, you shove a trowel under the jacket and really hope that you do not break another important fossil that happens to be under this one! Now, the jacket flips over and you have a little bowl containing the dirt and your turtle skull! This can be taken back to the lab and prepared more carefully with specialized tools and microscopes if necessary (plus air conditioning).
4. Preparation at the lab
The little bowl of dirt containing our turtle skull is now patiently waiting to be prepared back at the lab.


