Clay Chronicles Series
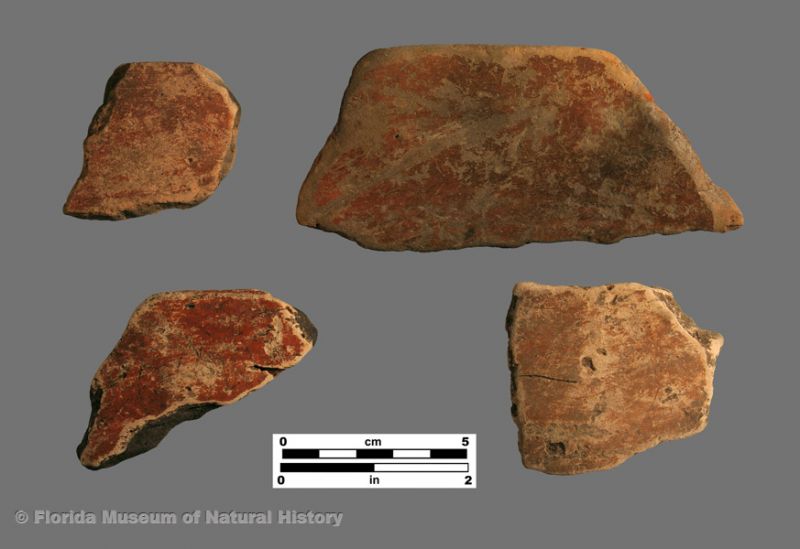
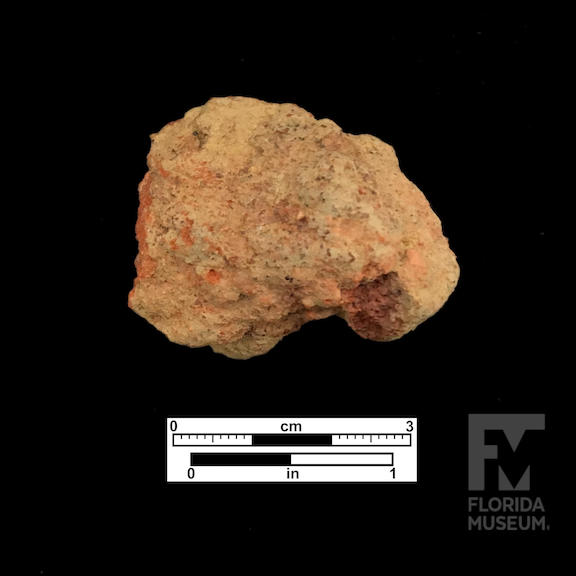
Dunns Creek Red Pottery, ca. 1800 years ago
This time I decided to tackle a toughie. Dunn’s Creek Red is a common pottery type from the Woodland Period throughout peninsular FL. It is the same as St. Johns Plain but with a red paint applied.
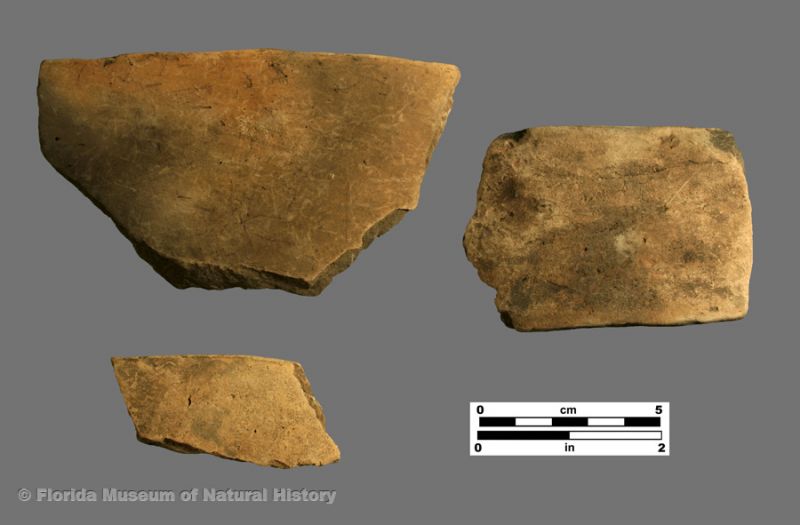
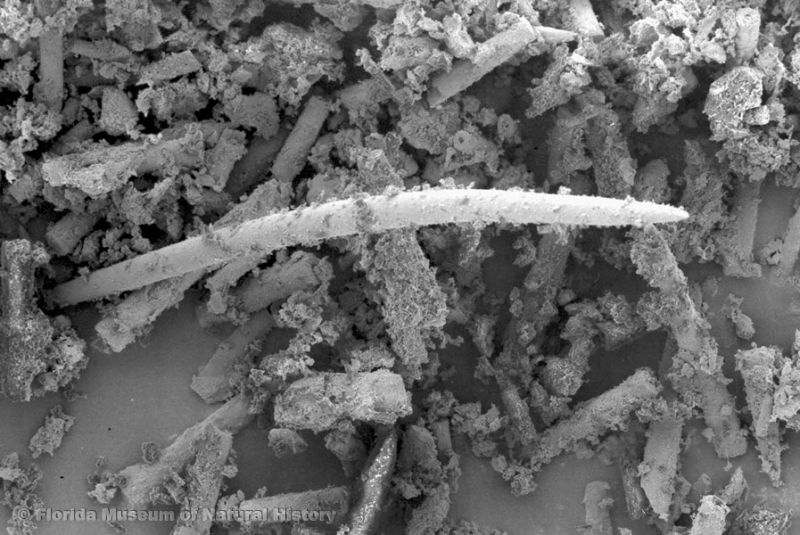
St. Johns and Dunns Creek were both made with a mucky “clay” harvested from the many wetland areas that dot the FL peninsula. I use the term clay very loosely, because our lab tests have shown that actually there isn’t much clay at all in the body of these pots. It’s mostly gummy decayed plant and animal matter and silica. This gives it a clay-like feel and properties. The silica is made up of sponge spicules. These are tiny spine-shaped shards, basically the same as fiberglass. They can’t be seen with the naked eye, but if you have soft hands you may feel them when working with the wet clay.
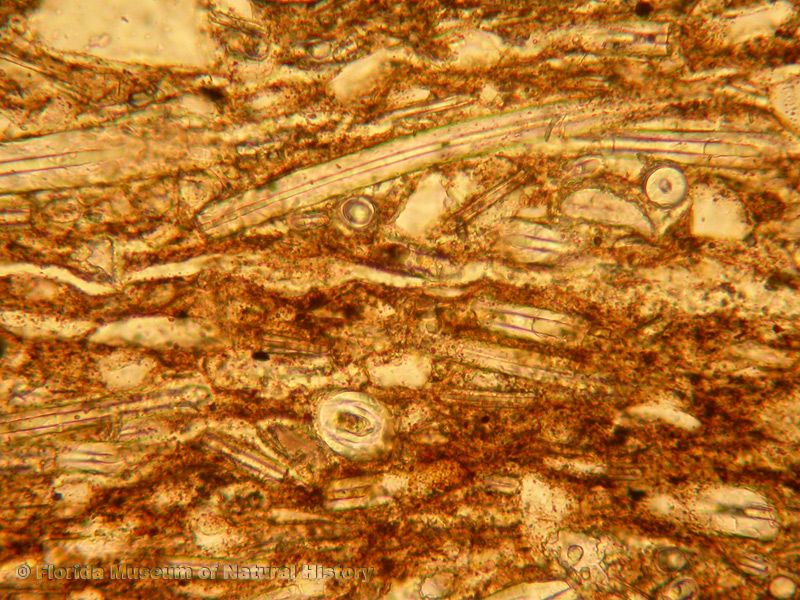
One of the difficulties of working with mucky clay is that it absorbs large amounts of water. It’s a problem because as it dries, it then shrinks a lot, causing warping and cracking, unless there are enough sponge spicules to hold the shape. The material I used came from excavations in Jefferson County, which we know from a previous study has about 20% sponge spicules. This is on the low end. I added a little bit of commercial clay to make it workable and hopefully overcome some of the shrinking problem. It was still VERY sticky and mushy. We would call this clay very plastic or “fat,” meaning that it is highly moldable–so moldable that it doesn’t hold its shape on its own. Because of potential issues, I decided on a very simple shape: a conical open bowl, and worked as dry as I could, using props to help maintain the shape as the vessel dried.
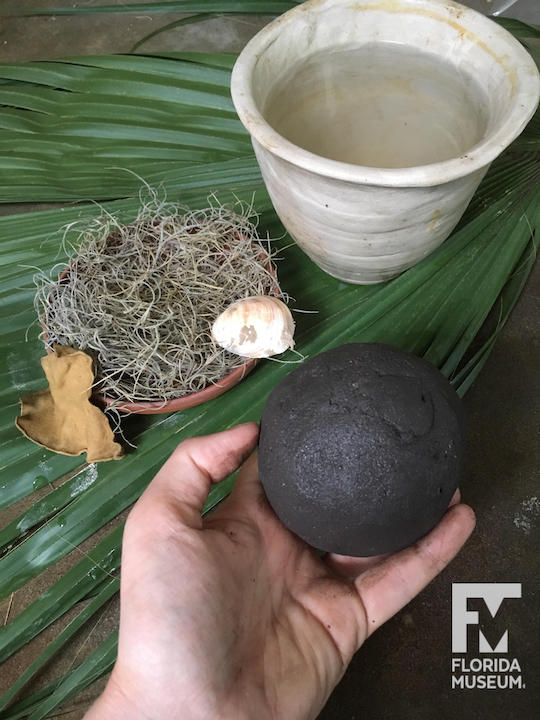
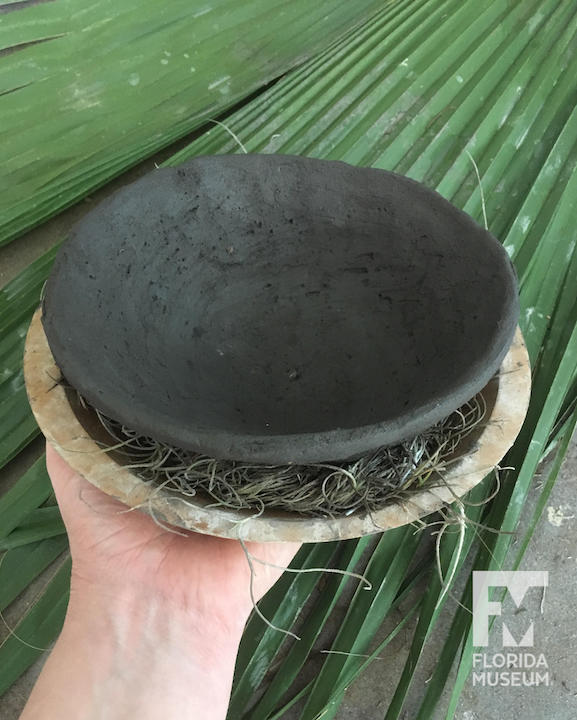
I started with a pinched base and then added fat coils, which expanded the body as I thinned them out. I let the pot sit and dry before adding my final layers, so it didn’t collapse under weight of itself. I left it covered to dry very slowly and evenly. After about a week, it had gotten to “leather-hard.” This is the stage where it is dry enough that it is stiff and your hands won’t leave fingerprints, but it is still slightly damp. I smoothed the surfaces and then applied the color to the bowl.
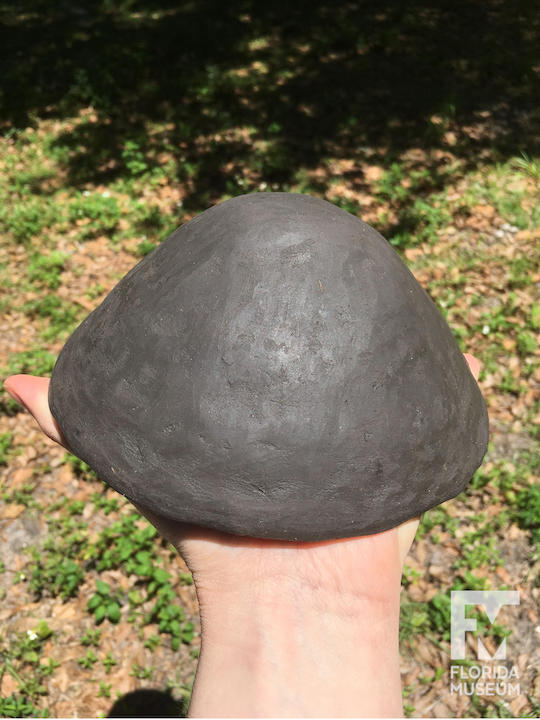
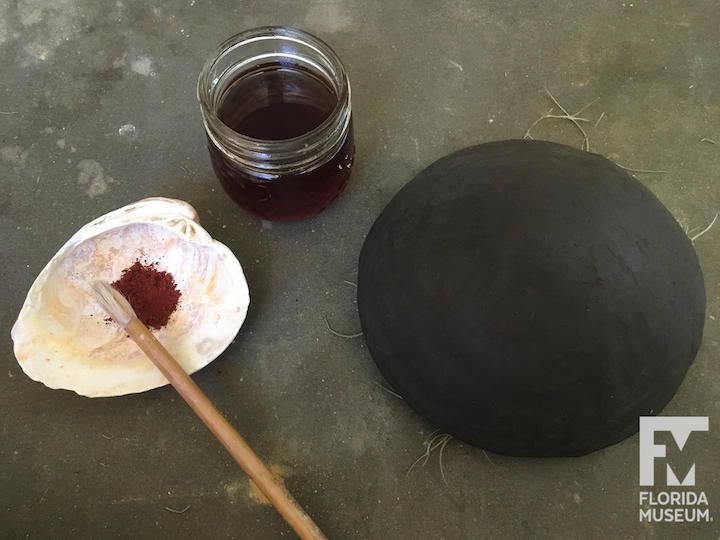
I had some pre-powdered iron oxide, which is the same composition as rust. It comes from iron-rich minerals, also known as ochers.In the past, potters would grind nodules of ocher that they found or traded. I mixed the powder with a little local honey from our lab volunteer Amanda. Mineral paints can be suspended with a variety of materials. Water, or a mixture of water and clay (slip) is most basic, but it can cause some shrinkage or flaking as it dries. Fat, tree sap, or in this case, honey, shrink less from drying and the stickiness helps the minerals adhere to the surface before it is fired. Honey bees arrived with European colonists, so this specific binder wasn’t available for making Dunns Creek Red in the past, but was my closest approximation to tree sap.

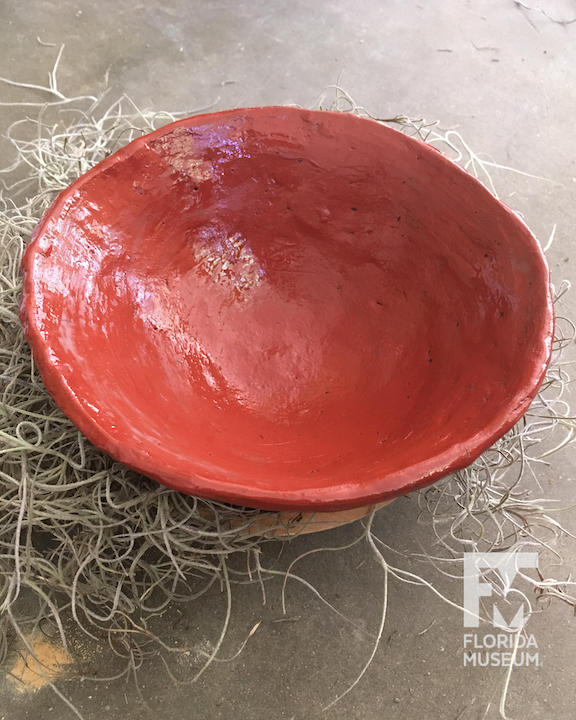

Now I’ve got this pot covered to dry slowly until I’m ready for the firing. I have my fingers crossed that it doesn’t crack.