In 2018, we received a donation of several reconstructed vessels of rare types and assorted pottery sherds from Florida. Since then, they’ve been sitting in the lab while we figured out what to do with them.
Contrary to what you might think, only a very tiny fraction of our pottery objects have been mended or reconstructed. Gluing broken pottery back together (mending) and filling in missing parts (reconstruction) are time consuming and the resulting pot can actually be less stable than the individual sherds. If there is no scientific or display reason for doing so, we tend to keep our pots in pieces, as they were found.
In museum settings, we focus on methods and materials that do no harm and can be reversed if necessary. For example, we use archival, acid-free adhesives, and water soluble fillers (Check out our pottery mending guide). In this case, the pots came to us already reconstructed, done decades ago using methods that are no longer advised. We asked the donor for his process and learned that this Pierce Zoned Red jar and small Weeden Island Punctated bowl were glued together using an adhesive made from dissolving old cellulose acetate film negatives! Soaking the negatives in acetone produces a DIY cellulose glue. Unfortunately, we now know that it isn’t great for mending pottery because the glue yellows and shrinks over time. Furthermore, cellulose acetate decays into acetic acid, which could break down pottery, and has other impurities from the photographic process such as silver nitrate.
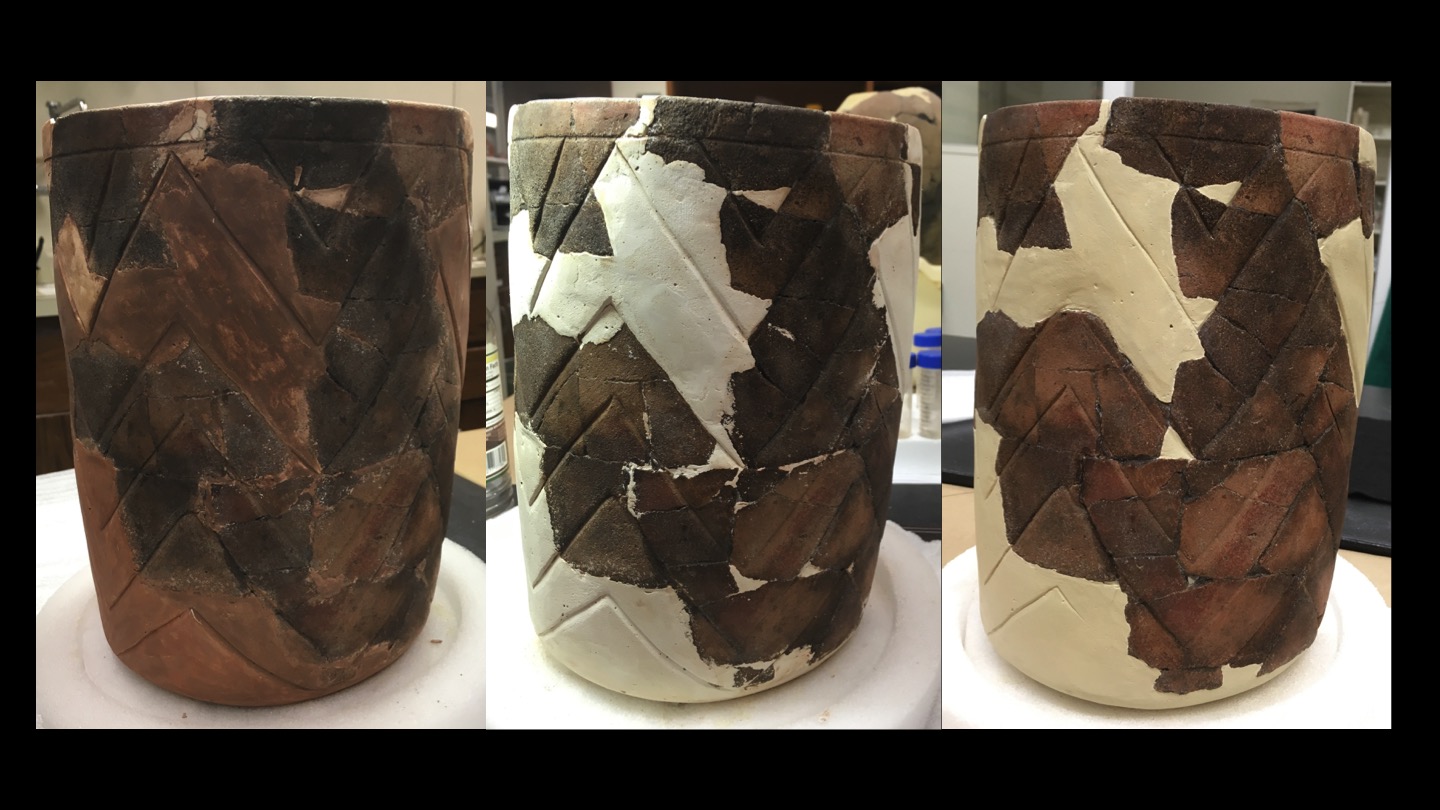
After gluing together the pieces, the missing sections had been patched with pieces of metal window screen and covered in plaster of Paris. A red paint was used to mask these areas and blend in with the original surface. Nowadays we prefer to use an easier and reversible product to patch pottery, and fill in missing parts without covering up any of the original. We keep the patches a neutral color so it is clear what is real and what is fake. With these vessels in particular, they had delicate designs and subtle coloring that was masked by this reconstruction job. So we (Jerry Kidder and Lindsay Bloch) decided to reverse as much as we could.
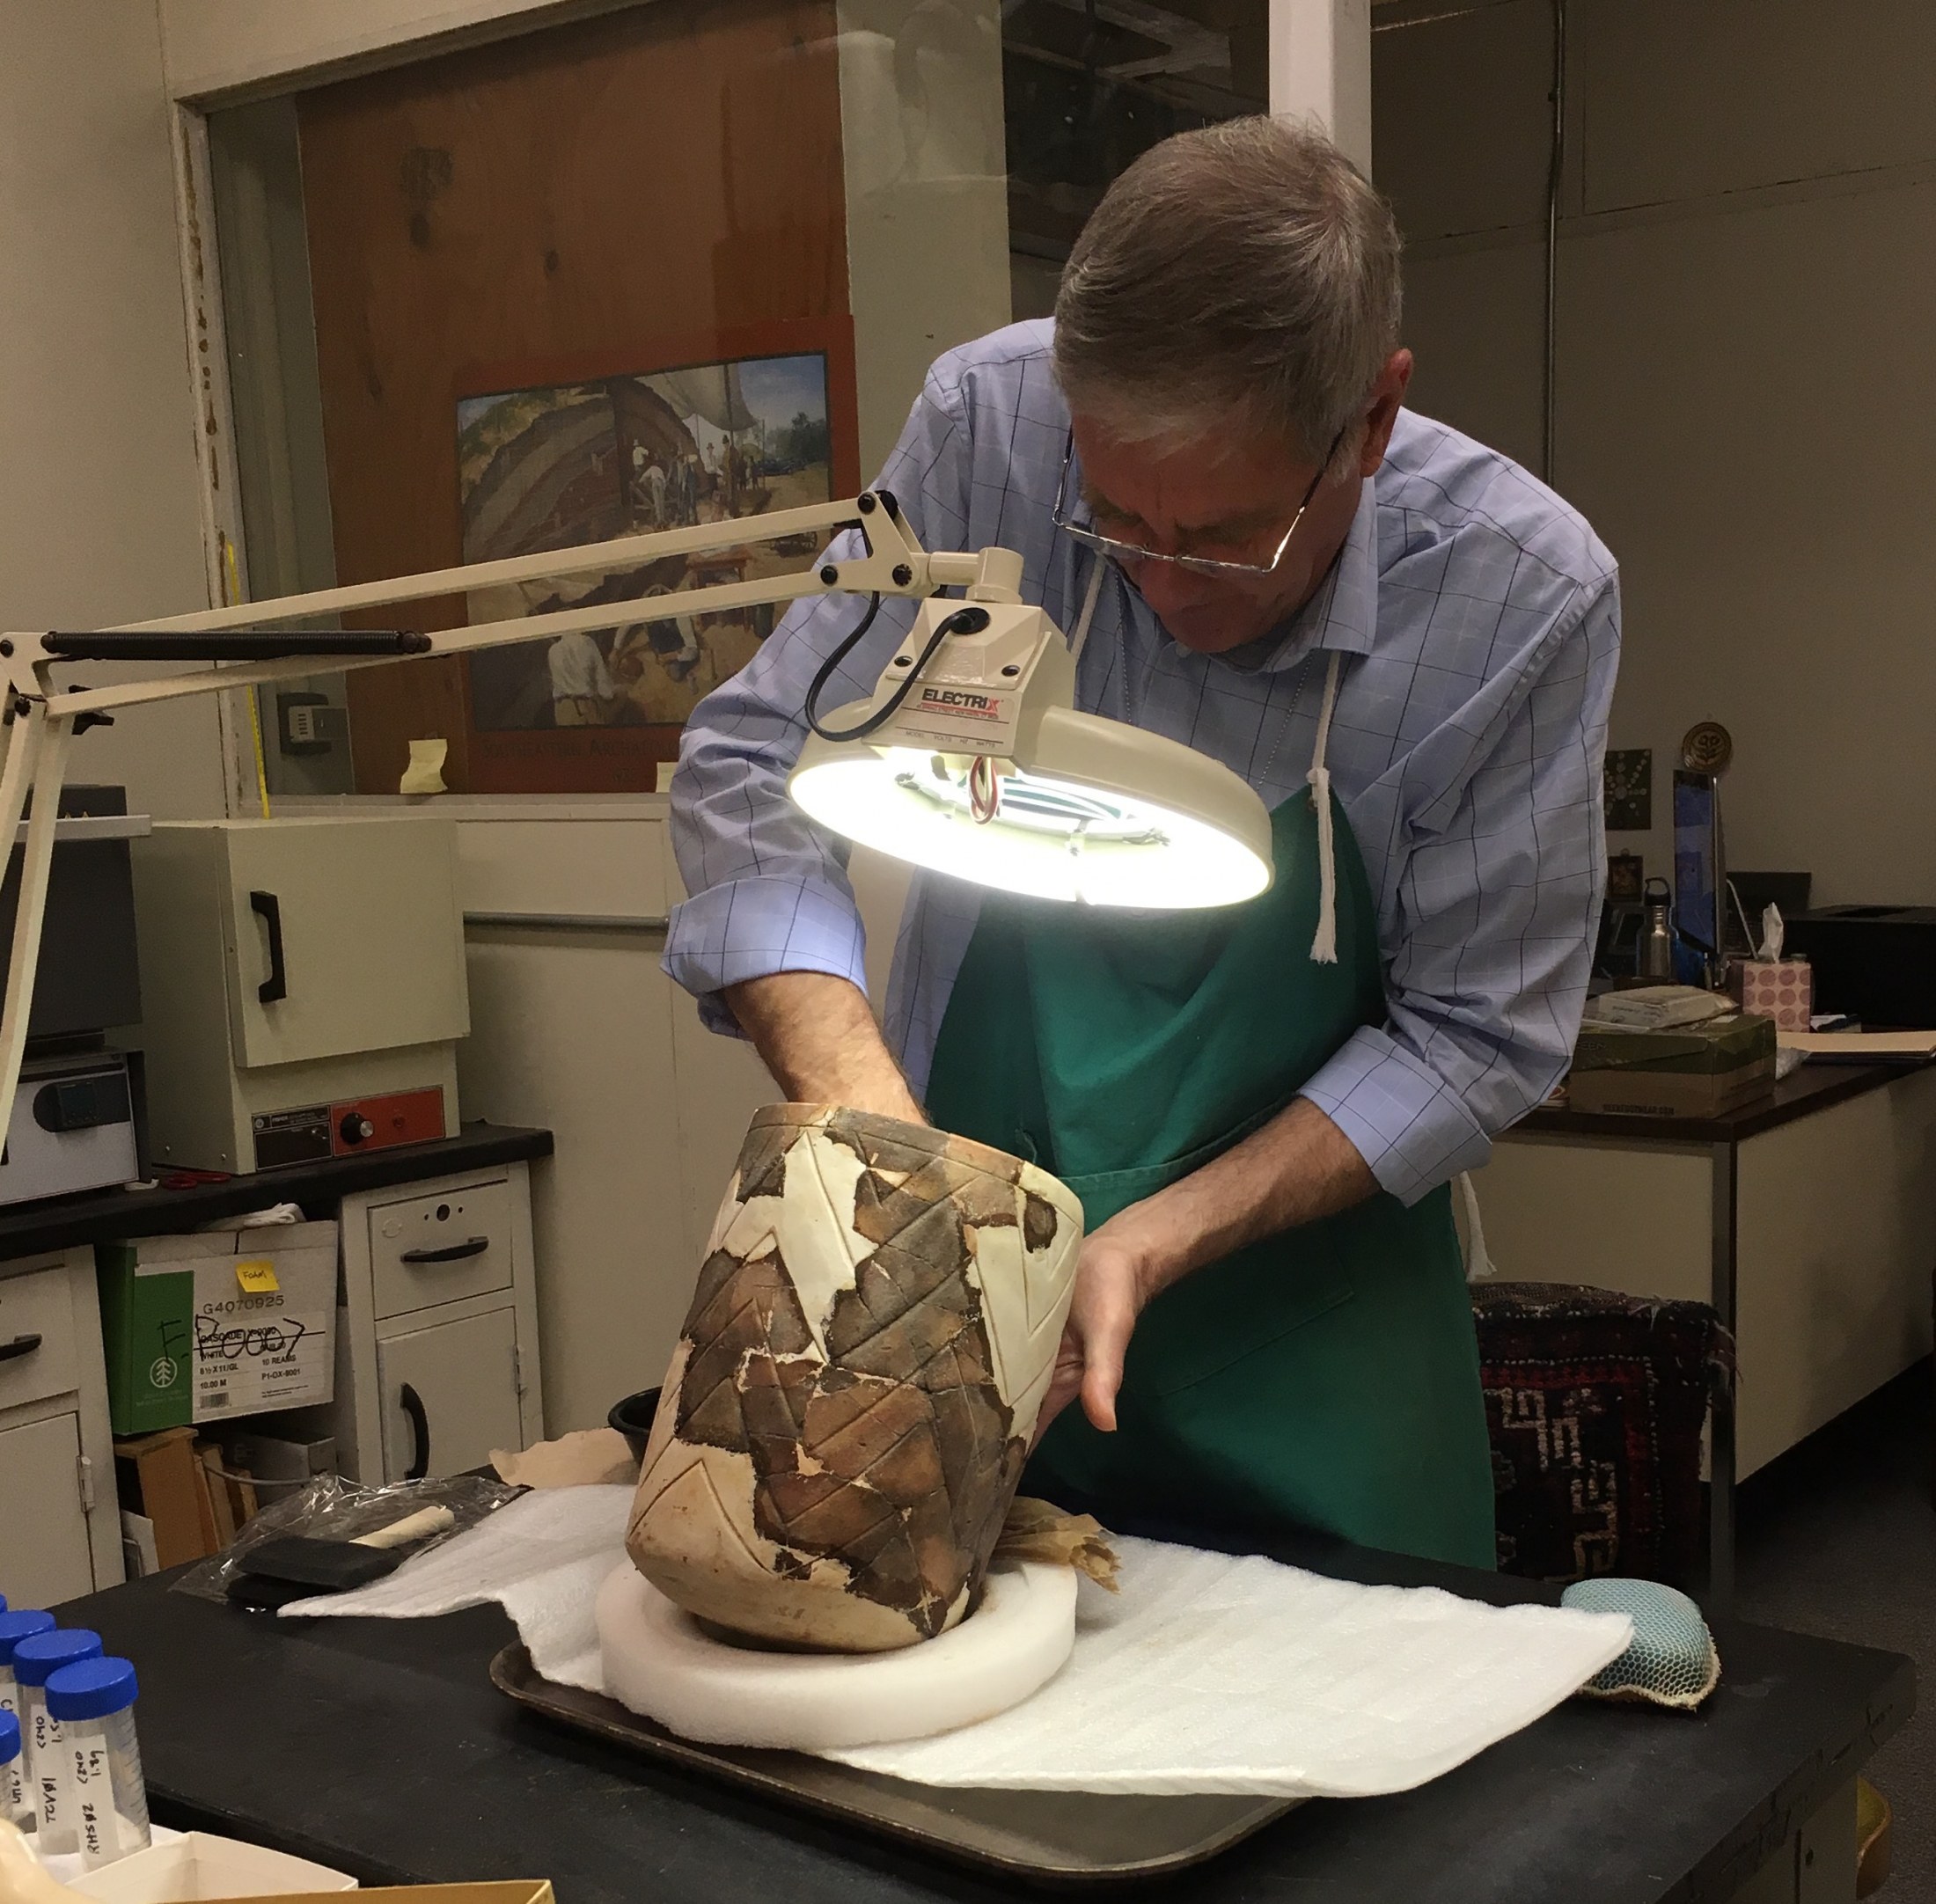
First, we tested and found that the paint could be removed with warm water. It turned out there was a lot of paint on the original surfaces! Then, we carefully chipped back the patches of plaster to find the original broken edges of the pottery. There was a lot of real pot hidden beneath overzealous plaster. We decided not to try to remove the patches or existing adhesive, because that likely would cause more damage to the vessels. Instead, we sanded the thick plaster areas to better match the contours of the pots, and painted them a neutral beige.
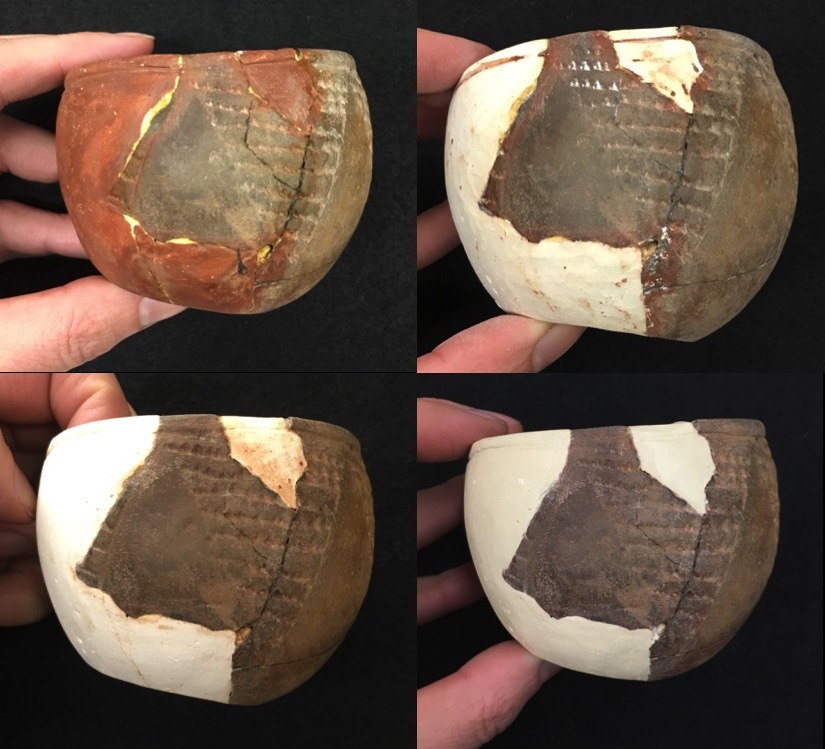
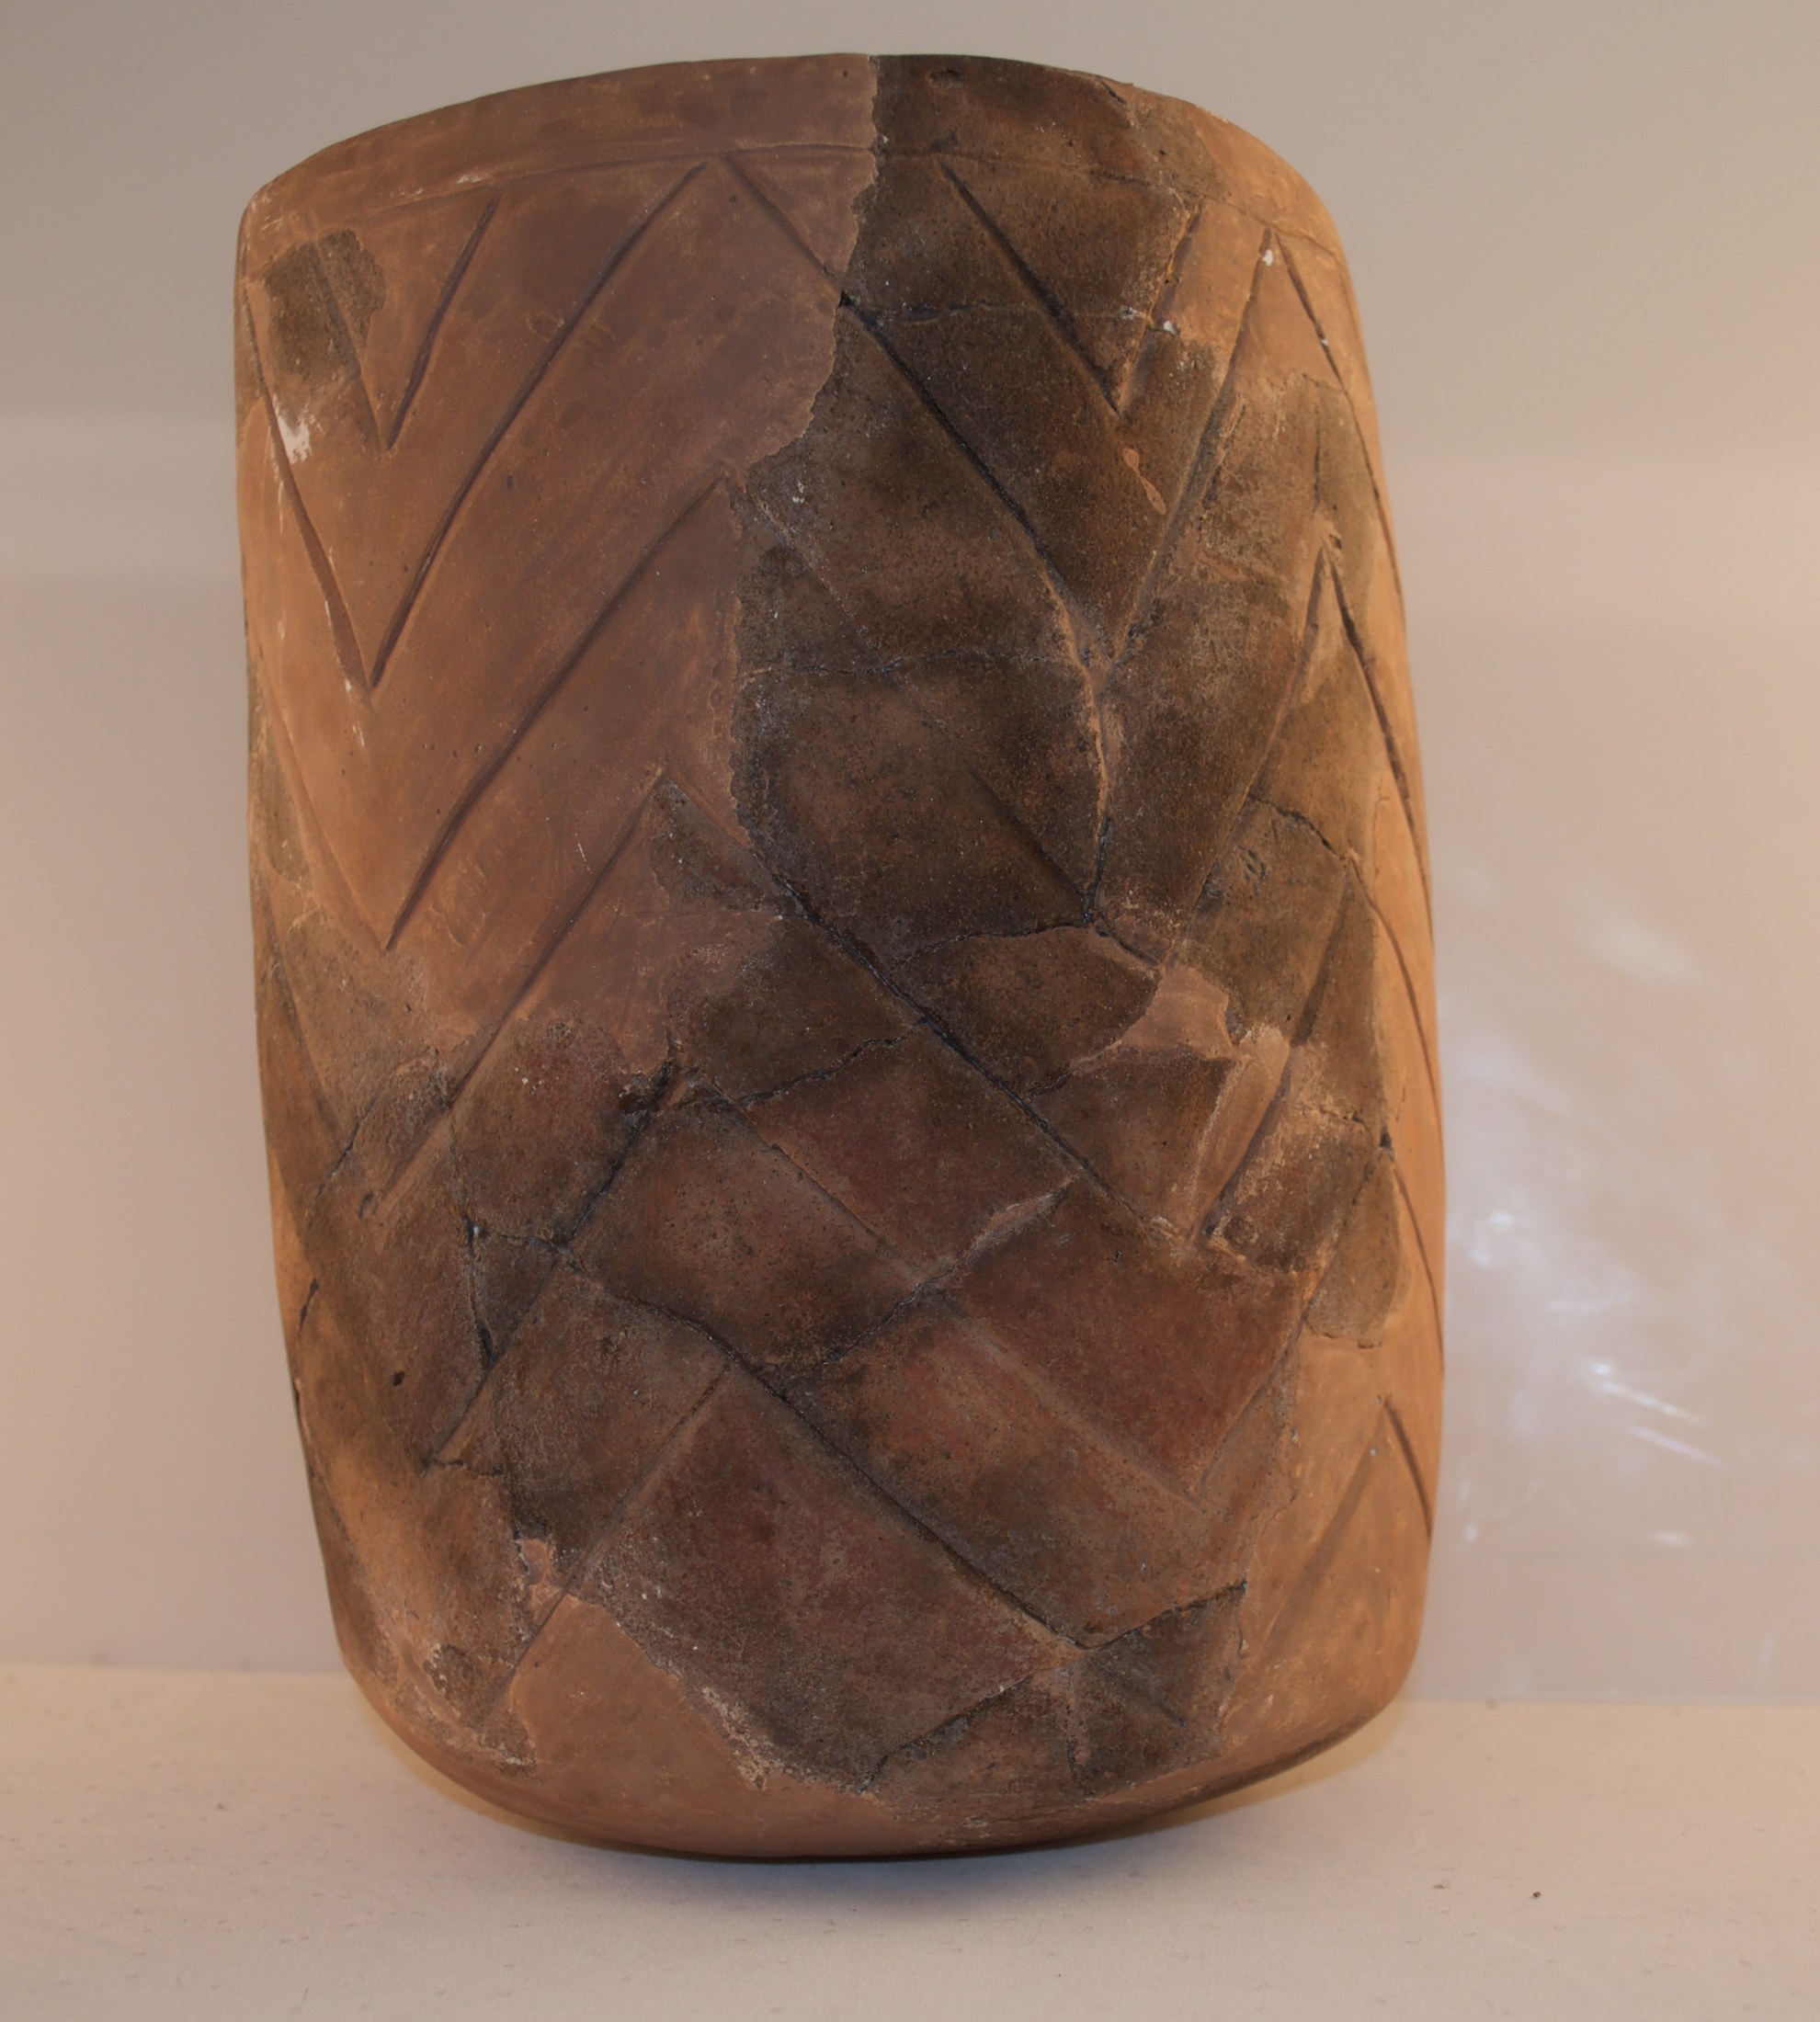
When we were done, we were amazed at how much easier it was to see the original red painted chevrons on the Pierce Zoned Red vessel, and after cleaning out globs of plaster could better appreciate the tiny punctations on the small bowl. Rather than hiding these “uglies” away, we’re now eager to share them with the public and other researchers.